Custom Length Based Loss Limits in CertiFiber Pro
If you are testing an "engineered link" using custom loss values for connectors and/or splices, you will need to know how to configure a custom test limit. A YouTube video is also available detailing how this is done.
Puede crear hasta 20 límites de comprobación personalizados en el CertiFiber Pro.
- Change to the PROJECT you wish to put this in or tap PROJECT from the home screen.
- Tap NEW TEST. (Si el módulo: no indica CertiFiber Pro, toque Módulo para cambiarlo a CertiFiber Pro)
- Tap Test Limit > MORE > Custom > MANAGE > Create.
- With a Fixed limit you will not have the chance to change the loss values for connectors and splices, this is for a single loss value for the whole link.
- Tap the Connector Loss button to adjust the loss limit per connector:
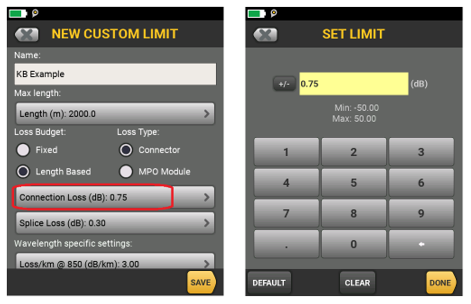
Nota: Tipo de pérdida: El conector y el módulo MPO son descriptores para el mismo campo de "pérdida de conexión". The idea of the MPO Module limit is to have a single loss value for the whole MPO connector as they are often specified. Le recomendamos que haga los límites de pérdida personalizados separados para el conector y el módulo MPO si está comprobando ambos en un sitio. Use el campo Nombre para diferenciar los dos límites personalizados.
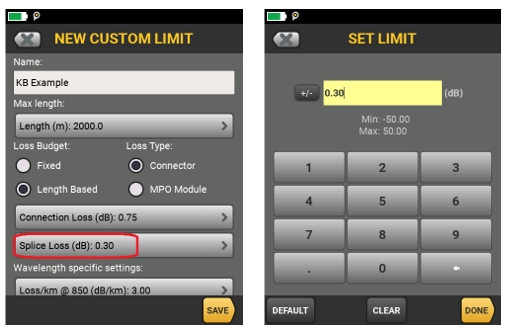
- To set the loss for splices, select the Splice Loss button:
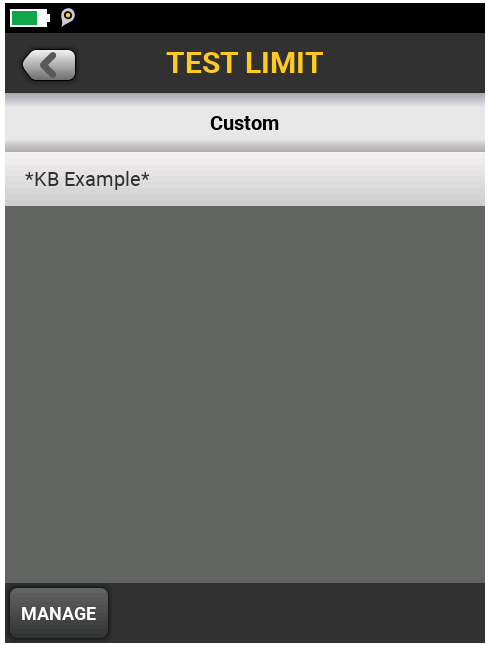
- For this example, I have named this custom limit “KB Example”; this will be the limit name on the test report. (Limit names can be up to 25 characters)
- Tap “Loss/km @ [wavelength]” for any custom loss values you would like to use for the fiber.
- Once done, tap SAVE to store your new the custom test limit:
-
Si toca el límite personalizado aquí, lo regresará a la pantalla TEST SETUP (CONFIGURACIÓN DE COMPROBACIÓN) con este límite seleccionado, que se muestra a continuación. Notice the placement of the asterisks before and after the custom limit name, this is to identify that it is a custom limit and they cannot be removed.

- Don't forget to tap SAVE again to store your new SETUP, then select it and tap Use Selected to move it to the HOME screen.


